Part 1 Home Lab Journey - Part 1
There I was, staring at a tangled mess of Ethernet cables, jacks, and tools, completely clueless about where to start. It was a humbling moment, and honestly, a bit frustrating. What seemed like a straightforward plan to set up a home network from my living room to the attic had quickly turned into a chaotic reality. But it was all part of the process, and I was about to learn way more than I ever imagined — from crimping cables and wiring standards to discovering that routers are often full of surprises.
A Trip to the Store: The First Challenge
With my living room full of gadgets and a workroom upstairs, I knew I had to run an Ethernet cable from the ground floor up to the attic, where my newly bought switch would handle all the connections. Easy enough, right? So I went to a few local electronics stores, expecting to grab a long enough cable and be on my way.
That’s when I hit my first roadblock. The shops didn’t have any pre-made cables long enough for my needs. I was stuck. But then, I spotted these D-Link Cat6 cables on the shelf—only catch? They weren’t terminated. They needed to be crimped.
Now, up until this point, “crimping” was just a word I’d heard in passing. I knew it involved pressing wires into connectors, but that was about it. Little did I know, this would soon become my initiation into the world of Ethernet wiring. With no other option, I grabbed the D-Link cables, some RJ45 jacks, and a crimping tool kit. It was time to dive into the deep end.
Enter the Cable Types: Cat5e vs. Cat6
While at the store, I also learned something important: not all Ethernet cables are the same. The shop assistant mentioned Cat5e and Cat6, and to be honest, I had no idea what the difference was. So, like any self-respecting techie, I Googled it right there in the store.
Here’s the short version: both Cat5e and Cat6 can handle speeds up to 1 Gbps, which is more than enough for most home networks. But Cat6 offers a bit more, like support for 10 Gbps speeds and better performance over longer distances—perfect if you’re future-proofing your setup. Since I didn’t want to run cables again anytime soon (trust me, it’s a pain you don’t want to experience twice), I went with Cat6. And if you’re running your cables through walls or attics, like me, outdoor-rated cables are a smart choice, especially if they’re exposed to the elements. In my case, they weren’t, but I tucked that tip away for later projects.
Crimping: A New Skill
So now, armed with my cables, RJ45 jacks, and crimping tools, I was ready to make this work. The first problem? I had no clue how to crimp a cable. I remember sitting there, staring at the kit like it was some kind of alien technology. Luckily, Google and YouTube came to the rescue.
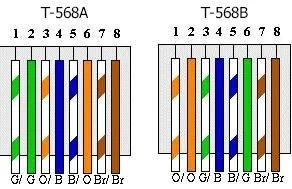
It turns out, when crimping Ethernet cables, you have to follow specific wiring standards: T568A and T568B. Both work just fine, but the wiring has to be consistent on both ends of the cable. Most people go with T568B, but for some reason, I decided to use T568A, thinking it wouldn’t really matter. (Spoiler: It did.)
T568A Color Code
- Pin 1: White/Green
- Pin 2: Green
- Pin 3: White/Orange
- Pin 4: Blue
- Pin 5: White/Blue
- Pin 6: Orange
- Pin 7: White/Brown
- Pin 8: Brown
I crimped my first cable, feeling pretty proud of myself. Then I plugged it into my TP-Link TL-SG105E switch in the attic, expecting a blazing-fast connection. What did I get? A measly 100 Mbps. I checked the network cable tester (thank goodness I bought that!), and everything seemed wired correctly. But when I looked at the switch’s lights, it showed the connection was negotiating at 100 Mbps, not the 1 Gbps I wanted.
Cue more Googling.
It turns out, for some reason, using T568A wasn’t cutting it. Frustrated but undeterred, I crimped a new cable using T568B, plugged it in, and… bingo! Full 1 Gbps. Lesson learned: I’m sticking with T568B from now on.
T568B Color Code
- Pin 1: White/Orange
- Pin 2: Orange
- Pin 3: White/Green
- Pin 4: Blue
- Pin 5: White/Blue
- Pin 6: Green
- Pin 7: White/Brown
- Pin 8: Brown

Running the Cable: From Living Room to Attic
Once the crimping drama was behind me, it was time to tackle the next big job: actually running the cable from the living room, through the walls, and up to the attic. Now, if you’ve never run cables through a house, let me tell you—it’s a workout. There’s a lot of crawling through tight spaces, fishing cables through tiny holes, and a lot of patience involved.
I managed to get the cable from the living room, through the floorboards, and up into the attic where my 5-port switch was waiting. From there, I branched out connections to my workroom and other parts of the house, creating a stable, wired network. It felt like a huge victory—until I hit the next snag.
The Anatomy of an Ethernet Cable: 8 Wires, 1 Mission
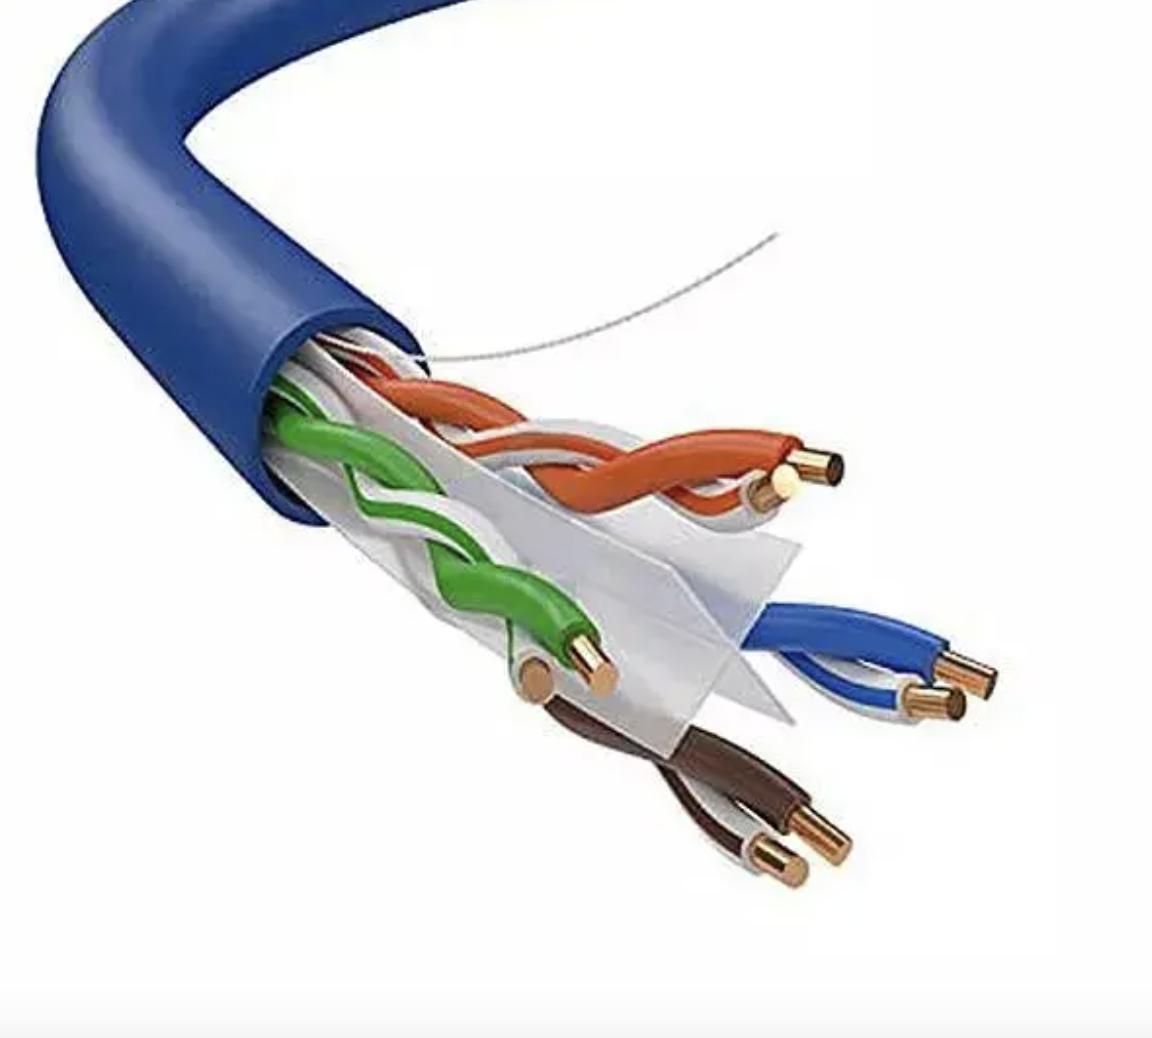
Before I go any further, let’s talk about what’s actually inside these Ethernet cables. Every Ethernet cable has 8 individual wires, each wrapped in pairs. These pairs are color-coded:
- Orange and white-orange
- Green and white-green
- Blue and white-blue
- Brown and white-brown
Each pair has a role to play. Ethernet cables use twisted pairs to reduce interference and allow data to travel over long distances without loss of signal. In a standard T568B setup (the one I stuck with), the wires are connected in a specific order inside the RJ45 connector, and only two pairs (four wires) are actually used for 100 Mbps speeds. But when you’re going for gigabit speeds like I was, all four pairs (eight wires) are used to send and receive data simultaneously.
If the wires aren’t crimped correctly or if the pairs get mixed up, you’ll lose speed or worse, get no connection at all. That’s where the cable tester comes in handy.
 Ethernet cable stripped
How the Cable Tester Saved My Sanity
Now, the network cable tester is one of those tools you don’t realize you need until you’re halfway through a project and something isn’t working. It’s a simple device with two ends: one you connect to one side of the cable, and the other to the opposite end. Once connected, it runs a signal through the wires and lights up 8 LEDs—one for each wire in the cable.
If the lights blink in order, from 1 to 8, your cable is good to go. But if any of the LEDs don’t light up, or if they blink out of order, it means there’s a problem with one of the wires. This saved me a lot of guesswork and helped me quickly identify when I had made a crimping mistake. Let’s just say that happened more than once.
 Cable tester in action
A Speed Bottleneck in Disguise
So, after running the cable to my workroom, I grabbed my trusty old Archer C60 AC1350 router to act as a wireless access point. I plugged it into the Ethernet cable, fired it up, and tested the speed. Once again, I was hitting a wall. I wasn’t getting the full 500 Mbps over Wi-Fi. Instead, the speeds were capped at 100 Mbps.
This one puzzled me for a while, until I checked the router’s specs more carefully. While the Archer C60 supports Wi-Fi speeds of 867 Mbps on the 5 GHz band, its Ethernet ports were only rated for 100 Mbps. In other words, my fast Internet was getting bottlenecked by the router’s slow Ethernet ports.

Back to the store I went, this time picking up a TP-Link Archer AX23 AX1800 router. With gigabit Ethernet ports, I finally saw the speeds I was expecting. Another lesson learned: always check both the Wi-Fi speeds and Ethernet port speeds before assuming your router can handle a high-speed connection.
Tools and Devices I Used
Here’s a quick list of the tools and devices that helped me survive this phase of the home lab build:
- D-Link Cat6 Cable: For high-speed, future-proof connections.
- RJ45 Crimping Tool Kit: Essential for terminating Ethernet cables.
- Network Cable Tester: A lifesaver when debugging connections.
- TP-Link TL-SG105E 5-Port Switch: My central hub in the attic for all wired connections.
- TP-Link Archer AX23 AX1800 Router: Finally delivered the Wi-Fi speeds I was expecting.
What I Learned
This phase of my home lab taught me several valuable lessons:
- Crimping is a delicate process. If you don’t wire things just right, you’ll end up with slow speeds or no connection at all.
- Not all routers are equal. The specs on the Ethernet ports matter just as much as the Wi-Fi speeds, especially if your Internet connection is over 100 Mbps.
- Wiring standards matter. While T568A and T568B both technically work, sometimes sticking with the more common standard (T568B) saves you a lot of headaches.
- Cable running is hard work. It’s physically demanding and requires patience, but it’s worth it when everything comes together.
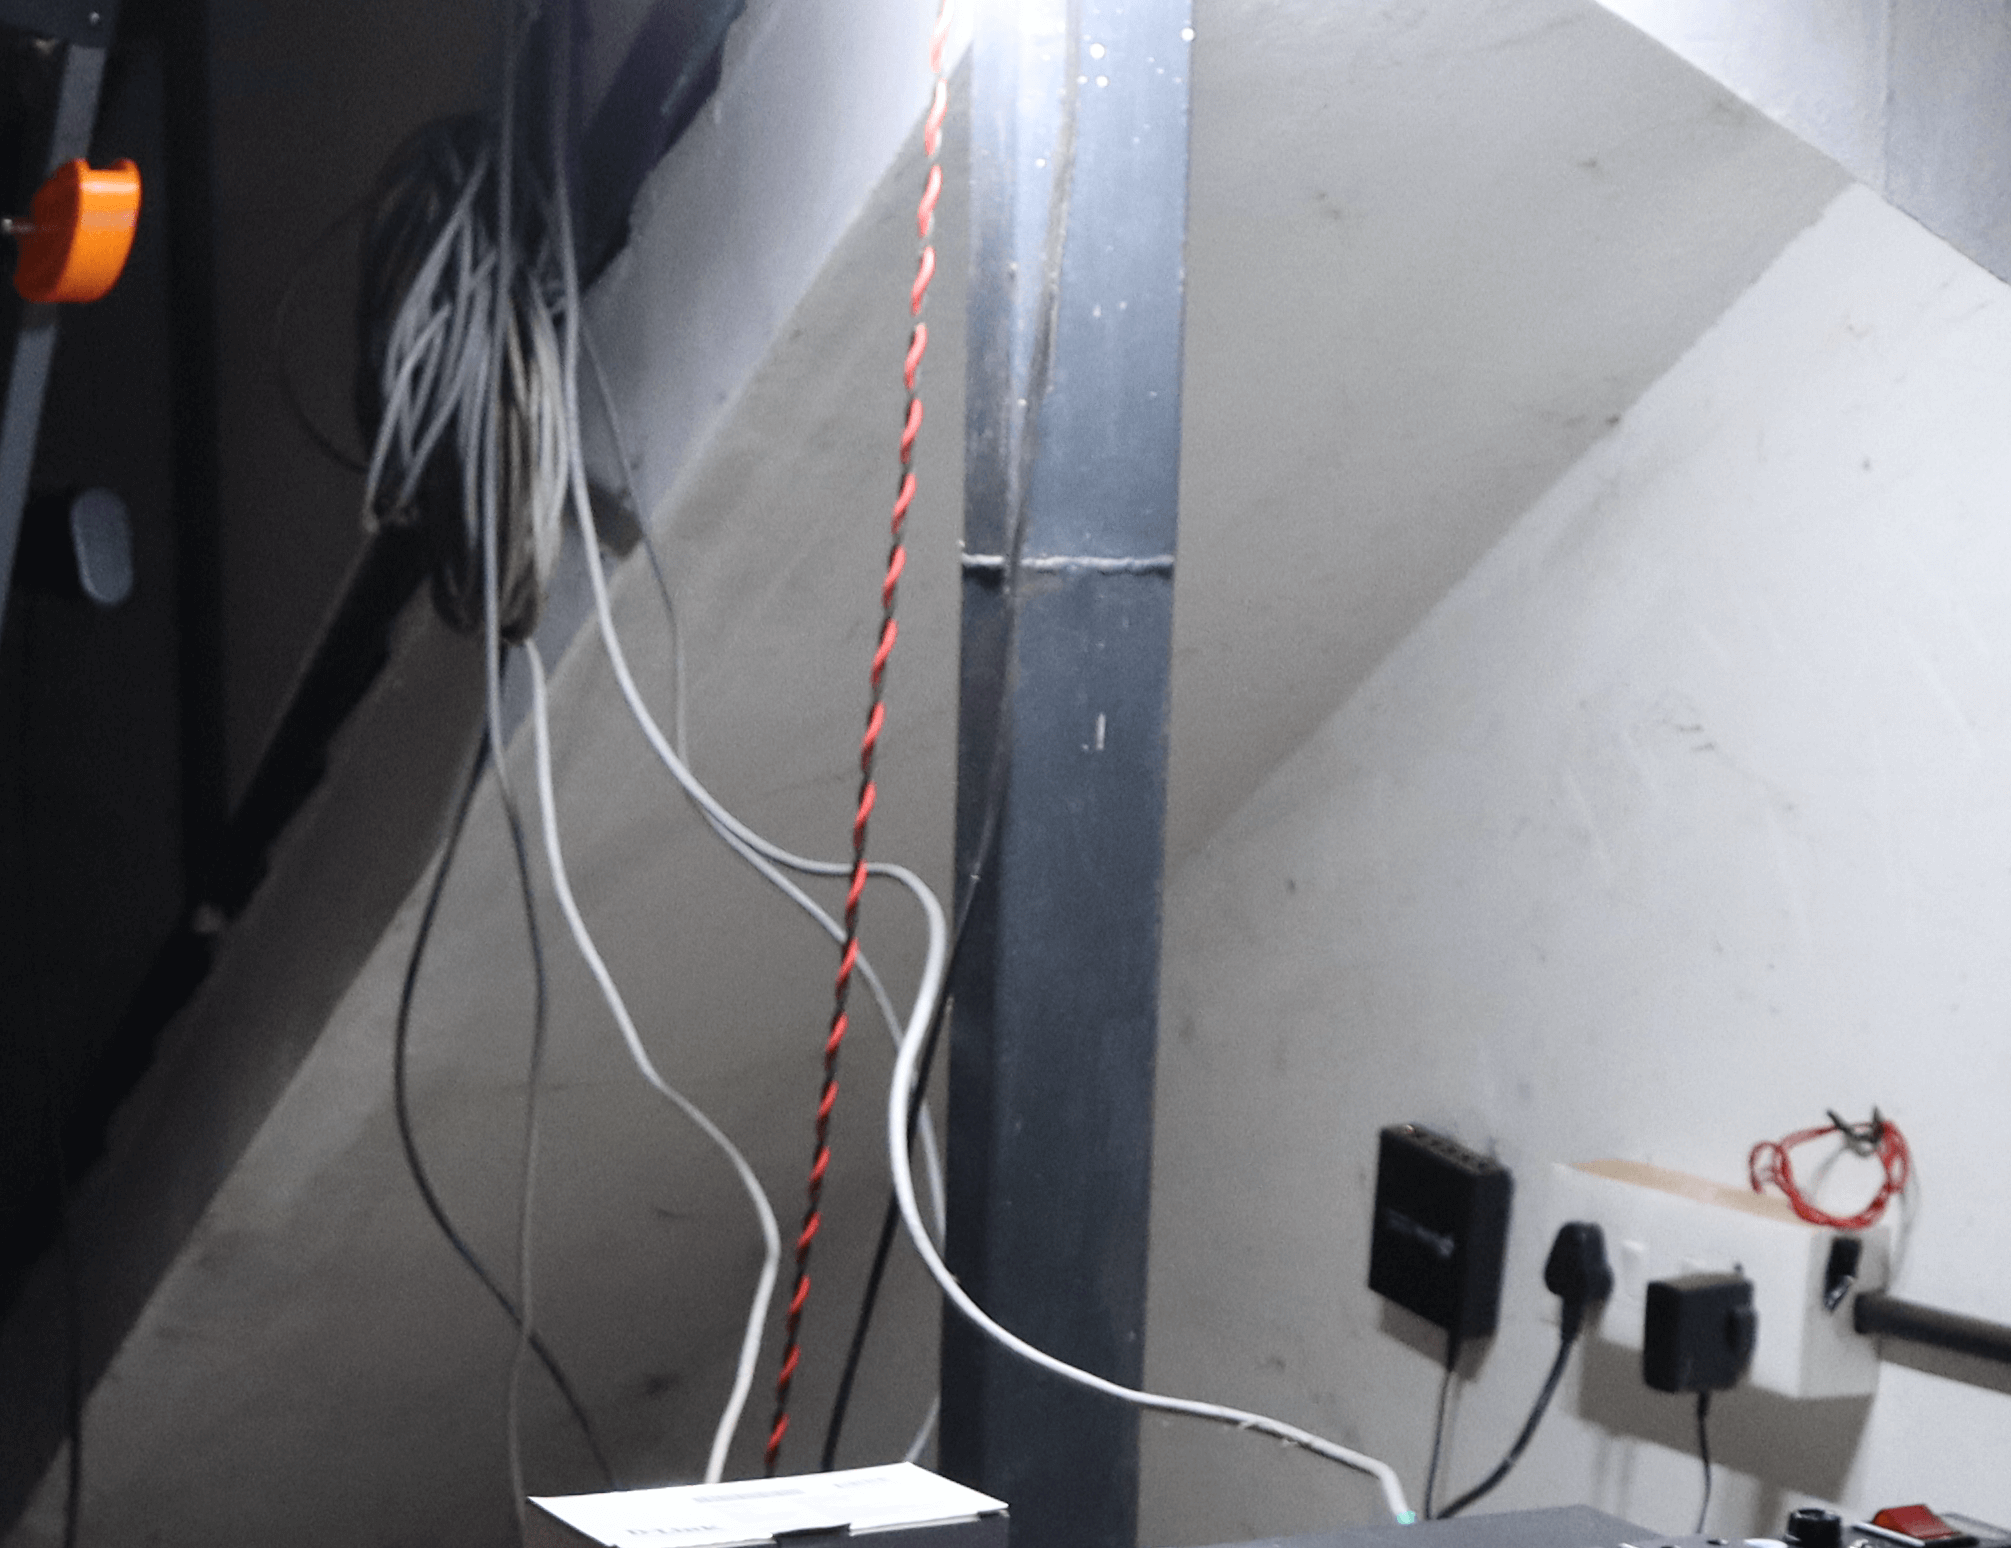
Unfortunately, I don’t have a dedicated photo from this phase of the project, but I do have another shot where you can see the setup in the background. You’ll notice the switch is wall-mounted, and, well… my cable management is pretty messy. I know the whole setup looks ugly! 😅

Final Thoughts
Looking back, setting up the physical infrastructure for my home lab was more challenging than I expected, but it was definitely worth it. Now, I’ve got a fast, reliable network in place, ready to handle the projects I have in mind. In the next post, I’ll be diving into the actual home lab setup—everything from choosing the right servers to understanding the essential gear I need to get things running smoothly.